Copyright

Copyright © Sheryl Williams - Yardfanatic
All rights reserved

Saturday, August 24, 2013

Texas Spa Treatment - Shoveling Rock In August

This is load 2 of 3. It's cheaper to have rock delivered in
these bags on their flat bed.  Pain to empty them though.
Ed drags them with the truck to tip them over.
Do you have clogged pores?  If so, I have just the spa treatment for you.  It's called shoveling rock in the middle of August.  You'll have a dewy complexion in no time because every sweat gland on your body - some you didn't even know you had - will blast through your skin like artesian wells.  Our water bill nearly doubled this month due to laundry because you can't leave those grimy, sweaty clothes in the  hamper.

What madness has inspired me to do this?  Gardening of course.  I have two projects in the works for the back yard.  The first is to create wicking vegetable beds with rock pathways and an arbor.  The second is to install a pond.  Both required a lot of rock.  Today I finally wised up and got up at 5 am to shovel the stuff, getting in several hours before the death star rose to slay me.

My "wicking" project is an expansion of the ditch on the uphill side of the house.  This area catches and holds the runoff from my neighbors lawns on my block.  It's a substantial amount of water when we get one of our Texas thunderstorms - almost of inch of water in about 30 minutes.  My idea was to dig it out further, replace the soil with larger rock, then direct the water between some of my vegetable beds and the blackberries.
The concrete pavers function as "gates" to
slow down the water so it can soak in. I got
the idea from how the flood irrigation was
set up on the sheep pasture we used to rent.

The rock I used was 3" crushed limestone.  I was hoping to find something else that wouldn't make my soil even more alkaline, but the price difference was huge. So I'll just count on the compost in the vegetable beds to offset the higher pH.  Good thing I collect coffee grounds from work!

Once a layer of this went down, I topped it with 3/4" crushed granite.  I really like this rock.  It's a pretty shade of pink and I just love the crunchy sound it makes when I walk on it.  (I blame the Masterpiece Theater shows on PBS. All those estates with crushed rock driveways.)  By topping the larger with the smaller rock, it settles in nicely and packs down to make a firmer surface.  This is pretty important since this is a major pathway for the wheelbarrow and hand truck, and I need to have both wheel along without me having to fight it too much.

3" crushed limestone used as the
path bed.  The water should flow through
 here nicely without relocating anything.
The rock will continue down the side of the house until it collides with my vegetable beds.  At that point I will direct the water into a rock-filled water well with a soil center.  The water will soak into the soil and then wick up to the vegetable bed.  I'm hoping this will substantially reduce my irrigation (I'm VERY stingy with my rainwater) and give my neglected blackberries some additional moisture - which will boost yields and make the fruit much sweeter!

All that for sweet berries?  Why not?  I figure all in all it's cheaper than a treatment at Lake Austin Spa and Resort although I could REALLY use a manicure after handling all that stone!


Sunday, July 7, 2013

Dumbarton Oaks - A Lesson on Garden Rooms

As part of a recent Colonial Garden Tour, one of the Washington DC area gardens we visited was Dumbarton Oaks.

It is a huge estate garden in Georgetown, one of historic significance as it once was the home of Robert Woods Bliss, a US Diplomat, and host to a "pre" meeting of what was to become the United Nations.  The Bliss' purchased the home in 1920 and did extensive remodeling of both house and gardens.  Bliss was also an avid collector of pre-columbian art, many of the pieces which still reside in the home.    It is now the Dumbarton Oaks Research Library and Collection, administered by the Trustees for Harvard University.

The gardens were designed by Beatrix Ferrand who was inspired by the great European gardens.  She was one of the founding members of the American Society of Landscape Architects and had her hand in several prominent gardens, one of which was the National Cathedral.
Dumbarton Oaks is stunning and huge.  It is about 50 acres and it comprises a series of terraces that step down the steep hill.  Within each terrace are several gardens, and for the first time I really started to understand the design concept of "Garden Rooms."  I know now that my idea of garden rooms was really "garden alcove".  Walking through this estate garden was a revelation - as only these big manicured places can be.  It was quite overwhelming at first because I can not even fathom the cost of such an undertaking.  This is truly how the .000001% lived.  We were there for several hours but still were only able to see glimpses as we hurried through the grounds.  I could have lingered in each garden room for an hour or more.


The design is artful.  Each of the rooms is separated visually by a gate, wall, or walkway.  You truly discover each one because your view is blocked until you enter it.  And once there, it as if nothing else exists.  It's an outdoor mansion so vast that one could forget that some of the gardens exist - like a room you haven't been inside of for ages.


Some of the gardens feature a partial overlook into the other,
but for the most part, each must be entered to be viewed.  One that particularly caught my imagination was this fanciful chicken wire "cloud" with chandelier crystals hanging from it. I'm going to try to reproduce this in my yard - on a MUCH smaller  - more alcove style - scale.

Another amazing garden was the old tennis court.  It is now a gigantic pebble garden featuring the Bliss family crest.  Our docent didn't have any details on how many workers or how long it took to complete this. I imagined myself going shopping for the rock.


 "The Orangery" is an enclosure off the main house that is covered within by a huge creeping fig (Ficus pumila).  The fig is impressive - even more so when you discover that it was planted in 1860.    One of my relatives was just establishing the homestead in Talent, Oregon about the same time.  I thought about Frank Kerby out there clearing trees in the wilderness while someone in Georgetown planted this ficus.

Certainly a lot to think about and some good inspiration to take home.  While building separate rooms in my garden is completely impractical - I can still use some of the visual cues to give my visitors a sense of discovery.  A well placed arbor, shrub or fence can suffice.  I'd really like to do a pebble garden but I just don't think I have the patience - and I fear I'd have to resort to chemicals to kill the tree seedlings that will invariably bully their way into it.  That chicken wire cloud is definitely a go though, as long as I can find a cheap source for the crystals.  Might be fun with plastic tear-drops in all sorts of wild colors.  Anyone have an old beaded curtain they want to get rid of?

That's interesting.  I swear I just heard Beatrix Ferrand gasp and Frank Kerby laughing "that's my girl."

Monday, July 1, 2013

Inside Jefferson's Head - A Visit to Monticello

I was lucky to visit Monticello on our recent Colonial Garden Tour.  It was raining that day but the view was still magnificent and we were able to go through the house and gardens.


Thomas Jefferson has always fascinated me.  How can one guy be so talented?  Land owner, architect, scholar, inventor of the United States of America, founder of a university, President - a complete over achiever.  What kind of person was he?  I was sure that the key to him must lie at his home in Monticello.

And so it did.  I came away from Jefferson's home with an impression of a fussy, animated, brilliant, exacting, tour de force of a person.  From the books to the clocks, the wall paper, the design of the windows, to the exact measurements for his cubby hole bed and his thousand foot vegetable garden, I started to understand - and relate to this man.

That Jefferson was an intellect, it was plain for anyone to see.  His house reflected his fascination with design and gadgets, and if he were alive today he would have more twitter followers than Lady Gaga.  His gardens had the same sort of obsessive approach.  Everything was laid out to specific plan and placed just so.  The thousand foot restored vegetable garden and orchard had the same sort of precision - and if it had a sound track it would be the mechanical sounds of a Bach concerto.

The views are stunning.  The house sits on top a fairly good sized hill and you can see the Virginia landscape stretch away before you.  I have never seen such huge hardwood trees - so big that they rival my beloved Pacific Northwest Douglas Firs in enormity. This place will steal your heart for sure and I can understand why he loved it so much.

But as a gardener - I find Jefferson lacking.  And I think the reason is that he was too much into the scholarship and not enough into the real production of a garden.  This is a weakness that I share with Mr Jefferson - and rather than be inspired, like I was at Mount Vernon, I came away duly chastised with what could have done better.

Jefferson kept very detailed records - which is why the restoration of his garden was done so well by Peter Hatch and the large extended team of plantsmen and historians. (Please pick up " A Rich Spot of Earth" by Peter - excellent book.)  The garden today reflects Jefferson's zeal with trying out new plants and the newer types of vegetables his African slaves grew (okra, gherkins, squash, and even tomatoes.)  This was pretty revolutionary during his time since European vegetables dominated the dinner plate.  It is laid out in a long terrace with the parade of vegetables dutifully marching and never straying out of line.  There is nothing interesting about how the plants were cultivated and no hint of soil improvement or irrigation techniques.  I was so uninspired that I didn't take a single photograph of it.

Of course, this might say more about me than Thomas Jefferson's vegetable garden.

What I do greatly appreciate about him is his pursuit of plant varieties and zone pushing.  I love that he cultivated a community of gardeners and enthusiastically traded seed and plants with just about everyone he met.  He kept a garden journal and his garden calendar got published in the local agriculture magazine.  In a way, he was acting like a Agricultural College Extension agent - with Monticello functioning very much as an Agricultural Experiment station.  Quite fitting considering the garden tour I was on included Doug Welsh from Texas A&M and a bunch more Master Gardeners.  Another achievement for Mr. Jefferson - America's first Horticulture Extension agent.  I like that.


Sunday, June 23, 2013

Following George's Footsteps - a visit to Mt Vernon

Recently I was on a Colonial Garden tour with several other gardeners including Doug Welsh from Texas Texas A&M.  We spent a week in the Washington DC area visiting several locations and meeting with the head horticulturalist at each site.

Our first garden was Mount Vernon, George Washington's Virginia estate, where Dean Horton, director of Horticulture gave us a tour of the grounds.

It was my second visit, but this time I was able to see it as more than a grand house of our first President.  Thanks to Dean, I could really appreciate the gardens and get a feel for what Washington was trying to do, and once the tour ended, my favorite of all that we visited.


It was the vegetable gardens that inspired me here.  Great walled gardens near the house provided suitable microclimates to grow many fruits and vegetables that were not common at the time.  As Dean explained, Washington was a zone pusher - something many of us totally relate to.  (What?  Can't grow that here?  Just watch me.)  Washington firmly believed that agriculture was going to make America a great nation.  He vigorously put forth to the other founding fathers that it was their duty (as the .00001%) to experiment and test crops because the common farmer could not afford to do so.  He even had a greenhouse.  Of course it was heated by a slave-attended wood fireplace.   

Fruit trees were a big part of the garden and most were espaliered.  The stone fruit was next to the wall since they were more susceptible to frost, with the apples and pears used as divisions between vegetable beds.   My own yard is ringed with fruit trees but I think I will add some more and train them similar to what was done here.  I think a few more pomegranate, peach and fig varieties might do the trick.

Manure figured very prominently in the science of agriculture during Washington's time and great volumes were written about it.  In the garden next to the great house, tasteful outhouses were perched on the brick wall and fitted with hatches near the ground from which someone could retrieve the contents.
These were just delightful and made me think of how wasteful my grandfather's family was.  He used to boast about his outhouse back on the farm in Arkansas.  It was self-cleaning he always told me.  It had a similar hatch but it was the hound that cleaned up after everyone.  Pity Grandpa didn't know the Washington's.

Another big takeaway for me was how every vegetable patch was bordered with flowers.  This attracted pollinators as well as supplied fresh herbs and bouquets for the house.  Some of them were four feet deep and sported a variety of plants.  I use flowers too but usually interplant them with the vegetables.  
 I like this idea of a border and it gives me another chance to add some color.  I'm thinking a riot of salvias, lantanas and a liberal dose of wildflowers will do the trick in my yard.

I like thinking that George Washington was an active gardener.  Was he one of those landowners that did more than prowl his estate barking orders to people?  It's hard to know but I imagine that a soldier like Washington had no problem getting dirty.  What better way to retire from creating a new nation than puttering amongst the cabbages, artichokes, apricots and of course, cherries.  When you look at the letters he wrote during the time they are filled with references to plants.  I like that he, Thomas Jefferson and John Adams exchanged news on what they were growing, new crops they were trying, and other gardens they visited.  Think of it, not only were they the founding fathers but the first garden bloggers!  

Next up, my impressions from Jefferson's little mountain - Monticello.   

Sunday, April 28, 2013

Primary Colors

I like my flower colors hot.  Screaming hot.  Blindingly hot.  Maybe that's why I moved to Texas.

Oh sure, I've got some nice pink roses, but for the most part I want my flowers to punch me in the face when I look at them.  No soothing pastels for me.

I tried, really I did.  I went through quite the english cottage-style gardening phase 15 years ago.  But somehow some screaming red or a gaudy orange always crept it's way back in amongst the lovely blues, pinks and lavenders.

In my newest yard I have planted color with abandon - and I blame Georgetown Texas.  One of the first places I visited after moving here was the poppy festival in Georgetown.  Lovely red poppies were sprinkled liberally between the beautiful craftsman homes.  I buy bags of poppy seed at the Wildseed Farms in Fredericksburg and plant every fall. These growing in front of the firecracker fern are particularly eye catching.


Subtlety has never been a word used to describe me. I seem to crash from one extreme to the other, never lingering in the middle for more than a nanosecond.  This trait certainly comes through in my plant selections.

Near the red poppies, sages and roses, a yellow yarrow has just started blooming.  It will go nicely with the yellow four o'clocks and lantana that will be lighting up in a few weeks.
Now that I have a garden full of bright colors, I find that I'm sneaking some blues in.  Bluebonnets, day flowers, salvias and agave complete the primary color wheel.  So let's see, that's three colors - maybe I am finding some middle ground after all!


Sunday, March 17, 2013

Insect Hotel Construction Complete

Doing the final construction of the insect hotel was definitely the fun part.  Assembling all the parts, building boxes, drilling holes - all very tedious and time consuming.  Especially since I had a deadline to meet!  Bumble bee queens emerge in February and I ordered some Mason Bees by mail.


The first pieces to go in were the shelving units.  Once they were secure, it was just a matter of placing everything.  The big rounds were the first to go in.

Ed helped by building the gable.  He also did all the cedar shake siding and roofing.

The pots of coconut fiber were tucked in.

Hopefully something will find these irresistible.

While I was putting it together I was buzzed several times.  The mason bees went right to the bamboo pieces and started building their nests.  A couple of lady bugs inspected holes too.

Now that it is up I visit it nearly every day.  I have almost a dozen mud-plugged holes now.  Today I noticed that the wasps were in the yard - hopefully they'll find a home in here too.

I am having so much fun with this!  My heart just leaps every time I discover a new nest.  As the new bees hatch I hope they stick around and start a family of their own.  I plan on cleaning the bamboo pieces and the nest boxes I purchased (only one hole taken so far) to keep mites from killing my bees.  No one has moved into the bumblebee nest yet, but a hornet was buzzing around today.  Hopefully she/he will move on down the road - don't really want a hornets nest.  But, like all superintendents, sometimes you don't get to pick your tenants!


Sunday, March 10, 2013

Scavenger Hunt - Building an Insect Hotel

Building insect habitat turned into a big scavenger hunt.

My goal was to reproduce this hotel with materials from my yard.  http://www.terrevivante.org/237-construire-un-hotel-a-inscetes.htm

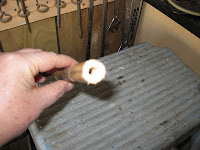
In addition to the bumble bee box and holes drilled in wood, I also needed some other tubular structures that bees might like to nest in.  Many designs use bamboo poles for this.  After a trip to Lowe's to supplement my existing inventory, I cut the poles into 5.5" lengths.  This corresponds to the width of the shelving I was using as part of the structure.


Since bees use mud to seal their nests, I purchased a kitty water and put it near the structure.  I filled the bowl with soil and made really nice mud.  The automatic waterer should keep it moist during our hot weather (as long as I keep the reservoir full!) Hopefully butterflies will use it for mud-puddling too.

The lacewing house became the biggest challenge.  Everything I could find said to use corrugated cardboard rolled into a cylinder.  Just a few years ago, this would not have been a problem.  Trouble is that cardboard has been completely replaced by bubble wrap.  Even my shipping department husband couldn't score me any type of cardboard that I could easily roll.

I decided to go ahead and try the bubble wrap.  I worry that it will not have the right air circulation, but it's worth the experiment.  I rolled a layer of newspaper with it to try to emulate cardboard - we'll see if that works.

I made a plywood box to hold the rolls.  The slits in front were made with a jig saw.

Many plans call for some sort of clay or mud bricks for solitary bees to nest in.  I have a bunch of 4" pots so I thought I could just fill them with mud and let them dry in the hot Texas sun.  However, one of my master gardener friends now sells coconut fiber bricks.  I bought two from him and used the coconut fiber to fill these square pots.  I cut the top rim off one pot so it will nest in the other.  The holes at the bottom make great entry points.


The shelf unit I used had two shelves that were just the right height to tuck these pots into.  I used some cedar shakes to make sure they were crammed in there tightly.
Now that I have all the nesting structures built - we can assemble it!  More on that in my next post.

Sunday, March 3, 2013

A Hole In My Head


I've been thinking about building a insect hotel for a couple of years now, all part of my quest to bring beneficial insects into the great St Augustine desert that is my neighborhood.  When I saw a picture of hôtels à abeilles I was even more determined to build one.

And then my trees started to die.  I had two Arizona Ash trees in my front yard and one of them was beginning to die - the one closest to the house, of course.  I had an arborist come out to take a look at it, and while it would probably take about three years to completely die, having that monster next to my house was worrisome.  Of course the problem was that if one tree came down, the other one would need to go also.  The canopies were interwoven and the remaining tree would be completely lopsided - posting yet another hazard.  So I made the decision to cut them down and plant new trees.

Now I'm not saying that I cut down my trees in order to have material for my bug hotel.  But I was delighted at the prospect that I wouldn't have to scrounge too far to find wood.

Be careful what you wish for.

I had the tree removal crew leave me some nice big branches and while supervising their work I also gathered up smaller twigs that I could use.  The first thing I had to do was cut the branches into 5.5" width rounds - that way they would fit into the shelving I was using for the framework.
I thought I'd just plop them on the table saw and square them up. Did I mention they were ash?  One of those really hard woods?  It took several passes and with ear splitting torque just for one end.  I made the rest of the cuts with the sawzall.  Took for frickin' ever.


Next up was to drill holes in all the pieces.  Since my drill bit was shorter than 5.5", I got to drill on both sides!  Oh, how I longed for my Dad's drill press.  It took me three days to finish the job.  And did I mention that the tree was ash?  What was I thinking?  Every hole was a huge effort because the wood was so hard - and green to boot.

Of course the idea for these pieces is to provide shelter for ladybugs, wasps, and possibly bees.  Most bees in Texas are ground dwellers and won't be too interested in these wooden homes.

If nothing else they are cool looking.

Did I mention they were ash?  I think I got carpal tunnel drilling those holes.  Not the smartest thing I've ever done, but hopefully worth it.

Sunday, February 24, 2013

Fit for a Queen


The first step to building my insect hotel was to research what future residents I could hope to attract here in my central Texas yard.  I already have toads, wasps and lady bugs, but want more bees and lacewings.

I learned that most of the native bees in Texas are ground dwellers.  That meant that whatever nest I built would need to be very low.  I learned that bumblebees like to nest in old mouse holes.  On the Internet I found a lot of sites in the UK that sell bumblebee houses and a lot of chatter about their effectiveness.  Apparently the queen is not easily amused.  Here are the two best websites I found for constructing a nest.  http://tomclothier.hort.net/page38.html.  http://www.insecthouse.co.uk/insect-house-designs/bee-houses/

I had some old shelving and thought that it would make a good start for the project.  The bottom shelf of this unit was about the right dimensions for the two-chamber design.
I cut a piece of plywood for the back and front.  The idea is that the front will be hinged so I can clean it out when necessary.


Then I cut a block to divide the two chambers and drilled a hole in it.  This is what the queen can use to enter the nest.

I cut a piece of 1/2" pvc and painted it brown.  Then attached it with glue in between to blocks.  This will help simulate a dark mouse hole.

I drilled a hole in the door for the mouse hole entrance.  Of course I didn't get this lined up perfectly and had to chisel out the hole.  GRRR.


I used a screen door latch for the door.  And installed hinges with the tiniest screws.  I had to improvise to find a bit small enough to handle them.


Finally I drilled some ventilation holes and stapled some mesh over them to keep other bugs out.  I cut up an old bag I had for the squares.

I installed the shelving in between the two posts I had placed in the herb garden.  I made sure that it was facing southeast and four inches from the ground, as recommended.


I saved shavings from the front yard tree removal and put them in one side of the box.  I also threw in some cat hair - mouse holes are hairy, right?

Now I just have to wait.  Bumblebee queens start looking for housing in February.  I haven't seen any out in the yard - in fact I have rarely seen any bumblebees in the three years I have lived here.  I planted lavender next to the box to try to entice them in years to come.  If I can make the backyard a destination, perhaps some day her highness will deign to grant me the magnificence of her presence and raise a regal brood.